Friday, May 25, 2012

Spring 2012 : History of Western Letterform

Yet another amazing class I took this semester conducted by Cheryl Jacobsen. I took it for historical credit but the amount of work made me want to take it as a studio and turn in a beautifully executed final project instead of a 12 page paper. We analysed a new hand every week using Historical Scripts by Stan Knight. The class focused on learning how to analyse a hand and write it. I will post the analyses soon.


The book has an image of a leaf from the manuscript on the verso,
a close up view on the recto followed by
a detailed description of the hand itself and its history


The seven step analysis helps reverse engineer how a hand was written in order to replicate it. 
The seven steps to be determined are : the weight (number of pen widths to letter height),
 the angle of the stroke, the weight, the shape of the letterform,
the speed with which the hand was written and
the Ductus - which is a map indicating the number, order and direction of strokes


We had to write pages and pages of the hand after determining the above mentioned criteria.
This image is of Roman Half Uncials, written with a quill


Click on the image to take a closer look


As one of our assignment we went to the Special Collections Library

and looked at real live manuscripts from different time periods.
We had to identify and analyse any one of the hands


This is an example of Rotunda. You can see the digital archives here


Workshop : Gaylord Schanilec


In the middle of February one of my own personal god came to UICB to conduct a two day workshop. Gaylord Schanilec of Midnight Paper Sales based out of Wisconsin came to share with us, his skills and knowledge. After the research I did on him last semester for class I have been following his blog and his past work, which is simply mind-blowing to say the least.

All images posted here have been taken with the permission of the artist. 

Please do not use or reproduce these in any way.


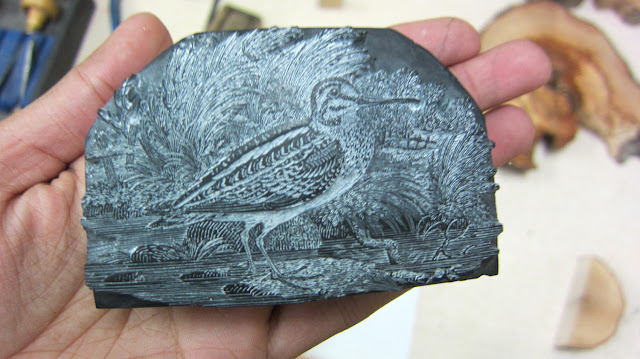
He prepares his own beautifully finished type high blocks
out of the wood on his land, ready to be carved.
They are both long grain and end grain


A block of wood printed as is


He also showed us some examples of end grain
engravings done long ago that he had acquired


The detail is astonishing


Look how tiny the trees are at the back


And the block itself is tiny!


A fish as part of his River project, carved by Schanilec


A detail of the scales


Gaylord's demo block that he carved in under 2 hours.
He also showed us how to print onto another block to make registration easy. Genius!


He brought along a bunch of progression proof from his Mayflies book. Just astounding!
Please click on these to truly appreciate the detail


When speaking of reductions, the keyblock as I understand it,
is the block that contains the most information relevant to
all other press runs. In this case I would guess its the third one from the left


I suppose the keyblock here is the first image on the left.
These proofs are a great way to appreciate the work that goes into
every single print as well as learn about the way colour interacts when overprinted.


Run 1


Run 2


Run 3


 Run 4


 Run 5 

This run makes me wonder whether this wasn't the keyblock. 
Notice the light hair like texture at the edge of the wings? 
This was printed at the end in the lightest colour. 
Maybe this was a separate block all together


Im embarrassed to even post this. Here goes.
We each had a block to carve. I decided to start with an endgrain block using an image
I had used to last semester's final project broadside. The image is copied onto paper vellum
with a pencil and then rubbed onto a lightly waxed piece of wood.
 Alternatively you can also do a xerox transfer


The paper helps the carbon from the pencil from smudging as you attempt to carve the block.
The xerox transfer method works better because
it doesn't wear off like the pencil. Carving endgrain wood is hard!!


Gaylord also cut some of our carving tools down to size so that they would be easier to hold.
It made carving alot easier. This is a detail of carving out the the outlines
of the form before clearing out the larger areas around the image


Clearing


It took a looong time to clear all this! Its harder than it looks


Ofcourse no one managed to finish carving their blocks by the end of the second day.
We took the rest of the semester. Because the blocks aren't square, you either
square them up using a saw or figure out a way to make the furniture fit around it.
I did neither. I also hand inked it (using a large brayer)


After printing the edition on regular weight paper I printed
some small postcards on this thicker paper.
All the clearing I had done didn't work quite as well -
 all that apparently not-type-high part of the block printed.
By this point I was too tired to care!


Spring 2012 : Papermaking

This term I took Western Papermaking, History and Technique with Timothy Barrett. It was absolutely wonderful and a lot of fun. We learned a lot about the use of the beater, different fibers, sheet formation, couching and drying. 


Starting on making a watermark for a project that I am working on.Its a book! and its going to flip a page! More on this, later


Soldering the different pieces together (6 in all) was challenging and took longer than expected.
I later discovered that the wire is coated and so it was much harder than it ought to have been!


As part of a side project I decided to use up some Pina fiber that I had acquired during my trip to the Philippines. The goal was to figure out the best possible sheet formation method for this particular fiber. What sounded simple took nearly half a semester of preparations and experimentation and eventually turned into a final project.


Soaking the Pineapple or Pina fiber before cooking


Cooking the fiber in caustic soda


After the fiber has been cooked, it is rinsed in a large bucket of water.
A stick is used to twirl the fiber in the water and lift it out clump by clump


 Beating by hand for 15 minutes


Separating the fiber into shreds before putting it into the Naginata beater


The blades of the Naginata beater tease the fibers apart


I experimented with Nagashizuki or Japanese style sheet formation as well as western sheetforming methods. To make western style sheets, experiments were first conducted to determine the proportions of PNS formation aid, pulp and water


The slurry was then mixed well and poured into the mould to make a test sheet


A deckle box was used to make these sheets. A small vat was filled with water and the box immersed halfway into it.
 The slurry was then poured in


The formation aid caused the fiber to float like a cloud in the water


This was then agitated and equally dispersed...


...and left to drain


The sheet ready to be couched


3 sheets couched onto a felt. These initial sheets helped determine the correct
quantities of water, formation aid and pulp


The Hydraulic Press


Translating the findings into proportions suitable for making larger western style sheets was tricky.
Initially I used a laid mould which proved to be difficult. The sheets were troublesome to couch


Among many other problems that were faced through this process small successes made it worthwhile. The couching issue was resolved by using a wove mould and applying water to the back of the mould in order to release the sheet during couching. The finished sheets were restraint dried as well as air dried, sized and burnished. The initial lustre was lost in the finished sheet but was brought back to some extent because of the sizing and burnishing


Thursday, May 24, 2012

Spring 2012 : Bookbinding II

This term's bookbinding course was conducted by Julie Leonard. She is an amazing instructor and I learned a lot thanks to it! We covered a lot of structures and did a few variations of each. Some of what we did has been posted here. More books to come!


Prepping the book for sewing on headbands


Beginning sewing after the core has been placed and held by the endbanding thread


This isn't the best example as the sewing was loose, but it gives you an idea of

how the endband progresses as you wrap and secure it around the core


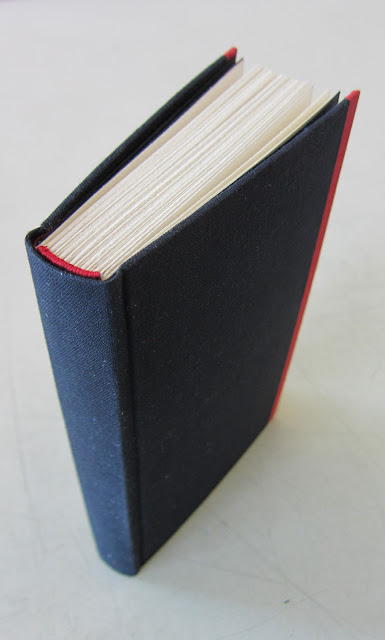
An example of a rounded spine case binding with sewn on headbands and a fore-edge strip


The headbands were sewn using red thread to match the flange visible on the inside and the fore-egde strip


The red cloth flange peeking through from behind the paste down


I eventually gave this book to a friend of mine whose name I calligraphed on the inside in the Engraver's Script


A german lapped case binding. I made a variable edition of 5


A paste down would cause a problem in this case as the cloth flange creates a certain distance from the board which in turn will show through the past down and appear unseemly


Trying to create a slight gradation of thicknesses, easing them into the board. As you can see there is book cloth, japanese paper lining and the lapped case component


To fix this problem I did a fill to create an even layer over which to put the paste down


A detail of the fill


Rounded case binding with fore edge corners. This is also called a 3/4 cloth binding because technically as I understand it,  the total amount of cloth used on the spine and the corners equals 3/4 of the total open width of the book


Detail of the headband


Long and link stitch. This non-adhesive structure was traditionally 
used in Germany and Italy in the 17th century for account books


I did a basket weave over the long stitch after completing the binding


Ethiopian binding with cloth covered boards


Detail


For the flyleaves I used beautifully printed Italian decorative papers 


 Perfect binding


 Or lets say, far-from-perfect binding. They were fun and easy to make but not very structurally sound. 
For this specific book I used Nepalese Lokta paper for the cover and dyed banana paper for the flyleaves


Drumleaf binding


The folios are literally 'drummed' along their fore edges and adhered along their spine edges
A piece of book cloth is then used to create the spine piece


This structure is good for binding together work created on separate folios or
work that requires that no thread passes through the center of the piece


This particular book is a collection of letterpressed folios done
this past semester in our Letterpress 2 class