Sunday, January 25, 2015

Anatomia Botanica

I finally have time to post some of the images from the finished book. To read about the making-of, click here, here and here. After being in the group show, Finite Landscapes held at the UICB, the book was also shown at the Pyramid Atlantic Book Fair in Maryland, where it won the Maryland Institute College of Art Book Prize.


The deluxe and the standard edition. The deluxe edition has been bound using a modified paper case binding with case paper. The paper for the edition of ten was handmade using hemp and cotton fibers. The standard edition has been printed on Hahnemühle Biblio and bound in a drum leaf binding with a hard case


The deluxe binding comes in clam shell box with a set of three movable prints


 The title page. The flourish under the title has been printed using linoleum reduction


The taxonomy of the Nelumbo nucifera


A detail


Nelumbo nucifera text spread, set in Bembo italics and roman


Hibiscus rosa-sinensis title page


Detail. The scallop pattern has been printed using photo polymer plates


The taxonomy of the Hibiscus rosa-sinensis


A detail


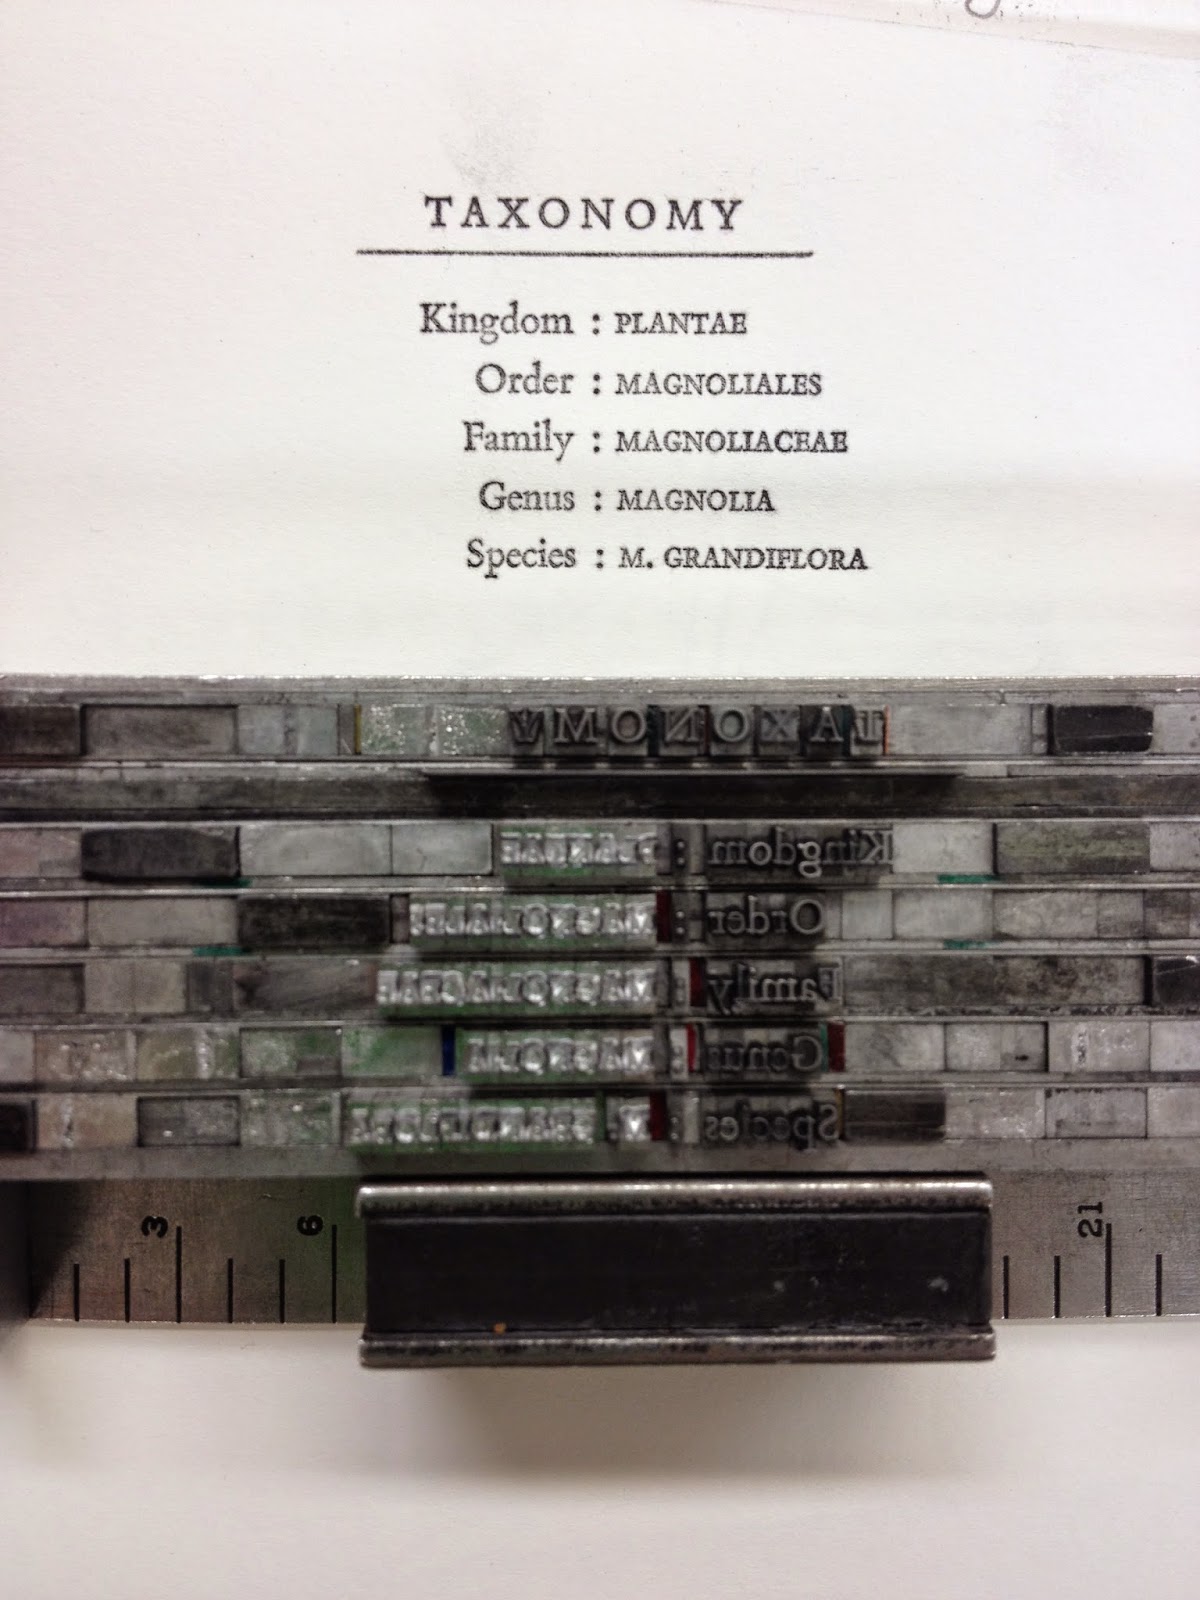
The taxonomy of the Magnolia grandiflora


A detail


Afterword


Monday, January 19, 2015

Blood Drive

I recently worked on a collaboration with Justin Cox, a poet at the Writer's workshop at the University of Iowa. It didn't take us very long to come up with an idea we both liked and wanted for the poem. I loved working on this broadside after printing the mammoth that was my thesis. This is a reduction linoleum cut with pochoir.


Sunday, November 16, 2014

Hand Papermaking Portfolio: Negative Space

Our proposal for a submission for the Hand Papermaking portfolio themed Negative Space was accepted last year. We were excited first, and then overwhelmed by the amount of work that was involved in creating 152 pieces needed for the portfolio. The great thing about participating in the Portfolio is that we each get one at the end! Anne Covell, Steph Rue and I worked together on this laborious project. The idea was to embed silk threads in between two sheets of abaca. The threads varied in colour, and went from dark brown all the way to the colour of the paper. They seemed to melt into the sheet and become invisible. The plan was to lay them out in a grid 1/4" apart from one another. In the middle, they would create a negative space as they melted into the sheet.


The test sheets were threaded using a gradation of blue silk threads.
We decided only to thread a portion of the frame and make a smaller sheet for the test


The frame was laid face down and centered onto the sheet of paper. The threads that weren't completely taut, absorbed the water from the sheet first, and remained in the position they were in when the frame was first laid down. They couldn't be re-positioned afterward.


The second sheet was then couched on top of the first carefully, and then pressed in a hydraulic press


The sheet after pressing


The test worked, and was accepted as part of the proposal. Now it was time to begin


The frame being threaded. We decided to make the sheets large enough to get eight out of a sheet. This way we needed to only make 30 or so sheets, accounting for wastage and mishaps


Threading completed - for one sheet


The frame was laid face down and centered onto the sheet of paper. The threads that weren't completely taut, absorbed the water from the sheet first, and remained in the position they were in when the frame was first laid down. They couldn't be re-positioned afterward.


The frame was carefully lifted and transported to the wet area to be couched. Vyvek strips were laid down prior to placement. These would act as cutting surfaces for the threads


The threads were carefully repositioned. Some that had already sunk to the surface of the sheet couldn't be recovered, 
but the others often could


It took all three of us to lift and reposition so as not to disturb any other threads


Post-pressing. Placing the second sheet on top of it was a stressful challenge.


After pressing!


Ta Da! The finished sheet. It was hard to get the threads to stay in the grid despite our best efforts, but we did manage to finish the edition, and each individual piece looked pretty good! Being included in the portfolio along with all the other artists was quite an honour. I will be posting photos of the finished piece in the portfolio as soon as I have it in my possession.


Update 3 and show!

After printing for about eight or nine weeks, I finally have some room to breathe and write another update. I have to say, so far it hasn't been as stressful as I thought it would be. I got everything I had to get done with time to spare. The show reception is in 4 days!


Starting to letter-space the small caps


 The biggest disaster (I was waiting for this one) was that all the sheets of handmade paper stretched and dried at different rates after dampening. I trimmed them all individually by hand with help from the wonderful Julie Leonard, who is on my committee. Disaster averted? Kind of. Each sheet needed to be placed differently on the feed board in order to register the next press run in the right place. I made a sort of jig to help with that. Luckily most of these sheets were translucent enough to see through.


 We got new windows in the graduate print room! The light comes in around 4 pm and hits the press bed in a yellow splash! Here is the last text run on the title page - for the pink ornament


 Cutting up the individual flaps for assembly


 Measuring for the hinge on the Deluxe edition


 Finished Hibiscus Rosa-Sinensis


 Finished Magnolia Grandiflora


 Finished Nelumbo Nucifera


 Lotus pod mounted


 Magnolia aggregate fruit (left) and Hibiscus pod mounted


The show!


Vitrine with stop motion animation process work


Vitrine with the folded form, standard and deluxe editions of the book, and a few of the reduction blocks showing process


Saturday, September 27, 2014

Update 2

After almost a month of printing everyday except three, for nearly ten hours at a time, I am finally finished with one-third of the book. The bulk of the imagery has been printed and now I am moving on to text! I'd forgotten how long it takes to get the type and ink just right. It took me three days to get the right black and the right spacing, sorts and impression. I am printing on the handmade paper after dampening. It stretches almost a quarter of an inch in each direction! Its a scary prospect thinking of how that will effect registration for the imagery later.
For now, here are some images from the past couple of weeks:

Nelumbo Nucifera. The light is a bit low on this one.
There is no natural light in the room in which I am printing, at the moment!


The Hibiscus Rosa-Sinensis. The stamens still need to be printed. Its a touch more pink in real life


Magnolia Grandiflora. This print is on the Biblio, which I am using for the standard edition. The strings attaching the seeds to the aggregate fruit still need to be printed


Finally, on to the text


I mized small amounts of warm red, yellow and pro blue to make a richer blackI had a lot of trouble getting the black to print right - and then I was reminded that I suffer from Chronic Under-inking, or the fear of over-inking.


But finally, I got the black that I wanted! The paper I made prints beautifully once its dampened.
The text looks very crisp and readable.